How to use the Grid view
The grid experience enhances the List and Expanded List views in Maintenance Connection, giving you more dynamic control over records shown and the ability to take action on them more efficiently.
Enable the Grid view
-
Go to Preferences > System and search "grid."
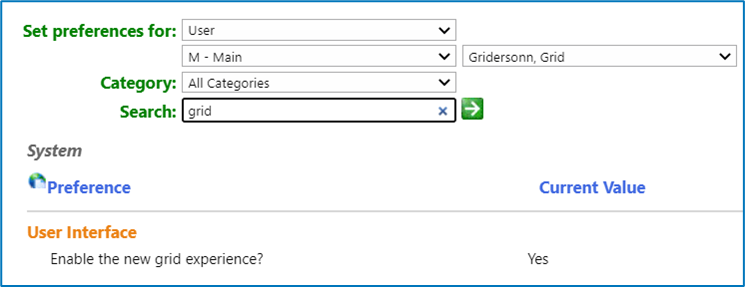
You can only enable the Grid view in user preferences, not in repair center preferences. Searching "grid" when setting preferences for a repair center does not return any results.
-
Click Enable the new grid experience and set the Current Value to Yes.
Note that this is a user preference. It cannot apply to a whole repair center.
-
Close Preferences to return to the WorkCenter and use the new Grid functionality.
You may need to log off and log back in again for the preference to be applied.
Resize columns
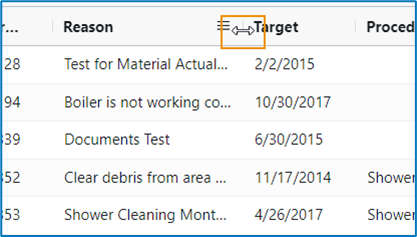
With grid enabled, you can expand columns in the Expanded List view. Whenever you want to resize a column in any module list, click and hold the line between column headers and drag laterally to expand or reduce column size.
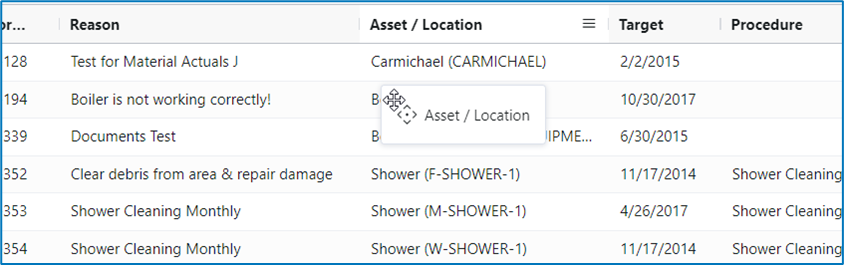
Focus on data relationships by dragging and dropping columns
With grid functionality you can reorganize columns to see fields side by side. Click the Asset/Location column header and drag and drop it next to the Reason column, move Department next to Target Date--reorganize the list however you want so you can focus on how the fields relate and take appropriate action.
See more fields, remove what you don't need
Don't see a field you need in the Expanded List view? The grid experience lets you add it easily, or you can remove a column you don't need at the moment. Open the context menu for any column shown, click the column button in the menu, and select or clear the check boxes for fields you want to appear.
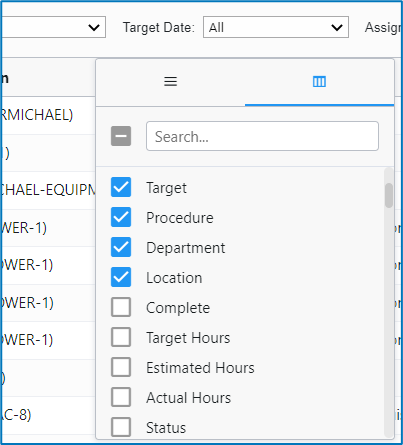
With this feature you can dynamically add fields that aren't shown in the list by default, like work order Status, for example. Then, you can drag and drop the Status column next to the Reason field to have a better sense of action needed.
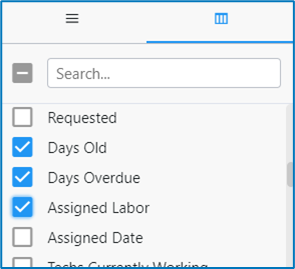
The Grid view includes some of our customer's most popular calculated fields as available columns, such as work order age (Days Old), Days Overdue, and Assigned Labor. Previously, without grid, you had to build these calculated fields with custom expressions. With grid, we did the work for you!
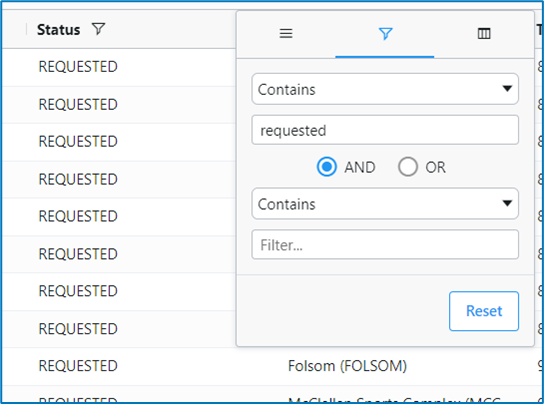
Narrow records shown by filtering columns
Let's say you've added the Status field to the Work Order List view and have dragged and dropped it next to the Reason column. Now you only want to see work orders that have a Requested status. You can filter records shown by a specific column and see only the records you need in the moment. To do this, open the context menu for the column, click the filter button, and enter the criteria for the filter. The list dynamically refreshes to show only records relevant to you at the time.
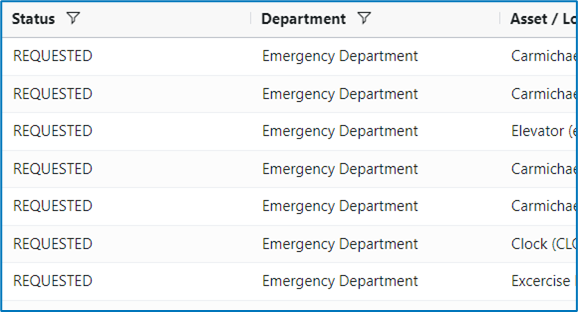
But what if you only want to see work orders with a Requested status for a specific department? You can do that with the Multi-Filter feature, which allows you to set filters for multiple columns and further narrow records shown. To do this, just repeat the process described above for additional columns.
Dynamic button availability
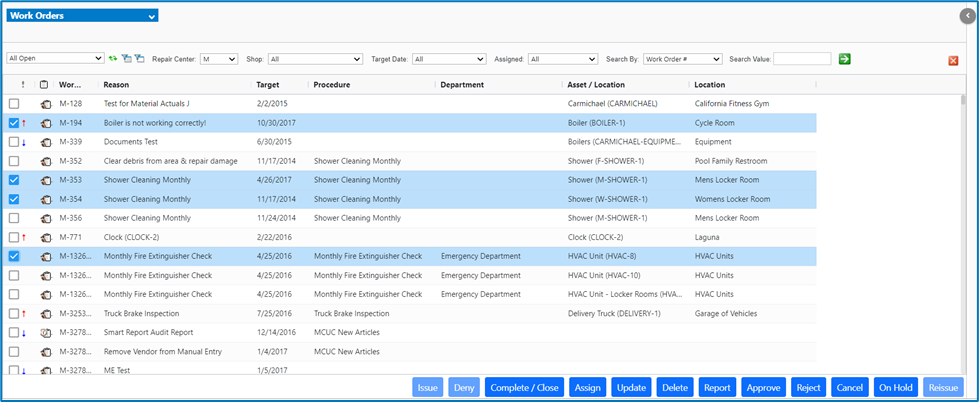
Grid functionality still lets you take bulk action on records in the Expanded List view, but with an upgrade. Now, when an action does not apply to a record in your selection, the button for that action is disabled. For example, if you select two work orders--one issued, the other not--the Issue button is disabled, thus preventing the action for both records since one is already issued.
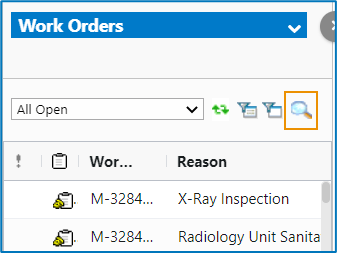
Searching with Grid
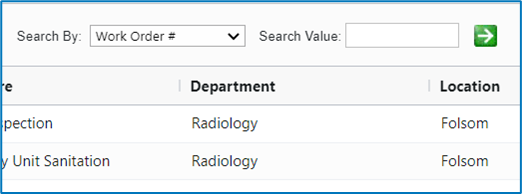
We better integrated search functionality into the List view by replacing the Search tab with a search button (magnifying glass button). This button opens the Expanded List view, in which the Search by and Search value fields are built in.
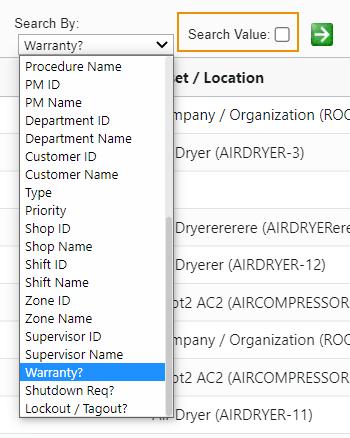
You can also search by yes or no values in boolean fields (such as Warranty? and Shutdown required?) in the Grid view.
-
In the expanded Grid view, open the Search by menu.
-
Select a boolean (true/false) field.
-
To search for records with a yes value, select the Search value check box.
To search for records with a no value, clear the Search value check box.
-
Click Search
 .
.
Exporting from Grid
-
Select the check boxes for the records you want to export.
-
Right-click on one of your selections.
-
Select Export > CSV exportor Excel export.
Your browser downloads the CSV or Excel file for your use.